


Blade Ball Ability Tier List: Complete Ranking Guide for 2026
That ball is screaming toward your face at impossible speeds. Your fingers hover over the parry button. But here’s the truth – your ability choice already decided this fight before the ball even launched.
This blade ball ability tier list ranks all 63 skills from S-tier dominators to F-tier mistakes. Each ability changes how you approach combat, defense, and mind games in Roblox Blade Ball. Picking the wrong one means fighting uphill every single match. Whether you main 1v1 duels or coordinate in Clash mode, this guide shows exactly where to invest your tokens.
How Abilities Work in Blade Ball
The Core Combat Loop
Every match revolves around parrying – hit the ball back at the right moment or get eliminated. Abilities layer on top of this foundation without replacing the parry mechanic. They enhance timing, manipulate ball behavior, or give second chances when reactions fail.
Some skills freeze the ball entirely. Others teleport you across the arena. A few summon allies to parry for you. Understanding these categories helps you pick options matching your playstyle.
Offensive Versus Defensive Classifications
Offensive abilities make your returns harder to handle through increased ball speed, curved trajectories, or misdirection. Defensive abilities keep you alive via auto-blocks, forcefields, and summoned protectors that buy time and forgive mistakes.
Neither category dominates completely. The strongest picks blend both aspects seamlessly, giving you survival tools and offensive pressure in one package.
S Tier – Meta Defining Picks
These five abilities shape competitive play entirely. You’ll face them constantly in ranked matches, making learning both their use and counters essential for serious players.
| Ability | Function | Why S Tier |
|---|---|---|
| Infinity | Stops the ball completely, gives shooting window | Unmatched reliability and beginner-friendly |
| Singularity | Pulls ball toward you, launches at high speed | Aggressive pressure that punishes passive play |
| Slashes of Fury | Stops ball, fire at variable speeds | Unpredictable returns break opponent rhythm |
| Dribble | Confuse enemies by bouncing the ball | Mind games force mistimed parries |
| Quantum Arena | Mass ability disable plus temporary buffs | Counters every other ability simultaneously |
Infinity – Why Everyone Recommends It First
Infinity earns universal praise for consistency. When activated, the ball stops cold before reaching you, providing several seconds to aim your return shot precisely.
New players love the breathing room since that panic moment during ball acceleration disappears. Veterans use it differently, saving activation for truly dangerous 200+ speed situations rather than easy parries. The skill works in every mode, every matchup, with no hard counters – only cooldown management limits its power.
Singularity – Pure Aggression Rewarded
Singularity takes the opposite philosophy by creating threats rather than stopping them. This ability pulls the ball toward you, then launches it at dramatically increased speed that passive players struggle to handle.
Timing matters enormously here. Activating on an already-fast ball creates near-unreactable speeds, while wasting it on slow returns accomplishes nothing. High skill ceiling, high reward – aggressive players should prioritize this option.
Slashes of Fury – The Unpredictability King
Variable speed options make Slashes of Fury incredibly difficult to read. After stopping the ball, you choose between slow curves or lightning strikes, conditioning opponents with patterns before breaking them completely.
Tournament players particularly value this ability since mind games compound across extended sets. Three slow returns followed by maximum speed catches even experienced opponents off-guard.
Dribble – Psychological Warfare
Dribble lets you toy with the ball before releasing it. The bouncing motion forces opponents to guess when the actual attack comes, causing early swings or delayed reactions – both meaning elimination.
The weakness? Experienced opponents learn to ignore the bounce and focus only on final release. Against repeated matchups, effectiveness decreases.
Quantum Arena – Team Fight Domination
Quantum Arena stands alone as the ultimate team mode ability. Upon activation, nearby enemies lose their abilities entirely while you gain temporary enhanced powers. That threatening Infinity user? Disabled. Guardian Angel ready to save your target? Gone.
In Clash mode, coordinated timing wins rounds outright through simple but devastating strategy – one player disables while teammates capitalize.
A Tier – Competitive Excellence
A tier picks compete at the highest levels but require more specific conditions or higher skill floors than S tier options.
| Ability | Function | Best Use Case |
|---|---|---|
| Phantom | Teleport behind enemy, slow them | 1v1 repositioning |
| Guardian Angel | Auto-block on missed parry | Survival insurance |
| Dragon Spirit | Summons defensive dragon | Passive protection |
| Necromancer | Spawns zombies to help parry | Multiple defensive bodies |
| Titan | Grants various temporary buffs | All-around enhancement |
| Time Hole | Area buff for you, debuff for enemies | Zone control |
| Fracture | Splits ball to target two players | Multi-target pressure |
| Death Slash | High-speed parry opportunity | Aggressive returns |
| Tact | Automatic curving on parry | Consistent trick shots |
Phantom – Repositioning Mastery
Phantom teleports you directly behind a chosen enemy while applying a slow effect, devastating in 1v1 scenarios. Your opponent tracked your position and calculated angles, then suddenly you’re behind them while they move sluggishly.
📖 Read More: Royale High Candy Bag 2026 Guide: Get, Farm & Trade
Smart users save teleports for critical moments when the ball already heads toward their target rather than spamming randomly.
Guardian Angel – The Forgiveness Factor
Guardian Angel activates automatically when you miss a parry, blocking the ball without any button press. You survive to try again, making this invaluable for beginners while also enabling riskier plays from aggressive veterans who appreciate the safety net.
Dragon Spirit and Necromancer – Summoned Allies
Both spawn helpers capable of parrying balls. Dragon Spirit summons a single powerful dragon providing consistent protection, while Necromancer creates multiple zombies offering more bodies but less individual reliability. These summoned allies shine particularly in chaotic Clash matches where tracking multiple threats becomes overwhelming.
B Tier – Situational Strength
B tier options require more skill investment or work best in specific matchups. They’re genuinely good picks for players mastering their nuances.
| Ability | Function | Situation |
|---|---|---|
| Raptor | Curves and speeds up ball significantly | Surprise angle attacks |
| Forcefield | Deflects ball while active | Active defense window |
| Zeus’ Storm | Slows everyone, disables abilities briefly | Mini Quantum Arena |
| Flash Counter | Teleport to last attacker, freeze them | Aggressive counter-play |
| Slash of Duality | Invisible ball or fast ball option | Unpredictable returns |
| Serpent Shadow Clone | Clones that can parry | Defensive backup |
| Pull | Ball targets you specifically | Controlling ball direction |
| Bunny Leap | Jump and trap enemies on landing | Area control |
Raptor – Curved Chaos
Raptor adds dramatic curves and speed boosts to returns. Opponents expecting straight shots get caught completely off-guard. The skill ceiling rewards practice since learning optimal curve angles for different arena positions takes time but pays dividends.
Forcefield Versus Phase Bypass – A Critical Comparison
Forcefield deflects incoming balls while active, providing reliable protection with predictable results – solid B tier performance. Phase Bypass grants temporary speed then teleports you back to your activation point, but that return teleport constantly creates positioning problems.
Forcefield sits comfortably in B tier. Phase Bypass falls to F tier. The difference is massive despite surface-level similarities.
Zeus’ Storm – Budget Quantum Arena
Zeus’ Storm briefly slows everyone while disabling abilities, functioning as a smaller Quantum Arena. The effect works well for players who haven’t unlocked the superior option yet and remains decent for variety afterward.
C Tier – Skill Dependent Results
C tier options can work against less skilled opponents or in dedicated specialists’ hands. They’re not actively bad, just limited in application.
| Ability | Function | Risk Factor |
|---|---|---|
| Reaper | Buffs per kill earned | Need kills to function |
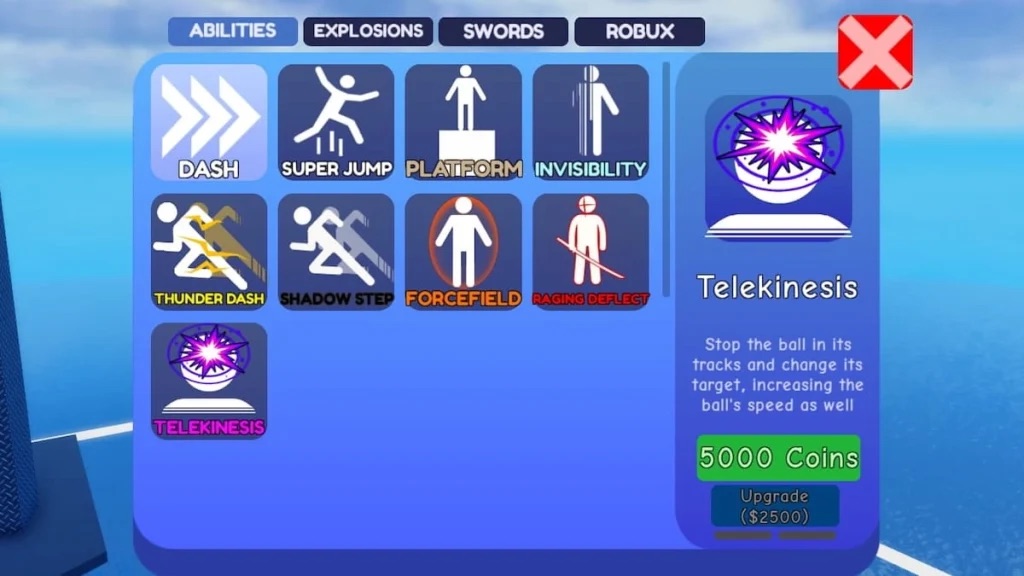
| Telekinesis | Stop and launch at target | Outclassed by S tier options |
| Freeze | Temporarily freeze ball | Weaker Infinity |
| Blink | Short teleport | Positioning only |
| Swap | Trade places with another player | Can backfire badly |
| Virus | Slow and blind enemies | Requires hitting targets |
| Ninja Dash | Dash to ball, instant parry | Aggressive but risky |
Reaper – Snowball or Struggle
Reaper buffs you each time you eliminate someone, theoretically getting stronger throughout matches. In practice, you need initial kills without ability support against S tier users who have Infinity or Singularity from the start.
Reaper rewards players already mechanically superior to their lobbies. If you consistently win parry battles without help, it amplifies your dominance. Otherwise, skip it.
Freeze and Telekinesis – Why Not S Tier?
Both sound similar to Infinity on paper. Freeze stops the ball while Telekinesis stops and launches it. The differences matter enormously – shorter windows, less control, weaker overall effects. Infinity simply performs better at what these attempt.
D and F Tier – Avoid These Picks
D tier has extremely niche applications. F tier actively hurts your performance in most situations.
D Tier – Specialist Only
| Ability | Function | Limited Use Case |
|---|---|---|
| Waypoint | Place marker, teleport back | Specific escape setups |
| Chieftain’s Totem | Buff allies, slow enemies in area | Coordinated team play only |
| Invisibility | Become untargetable temporarily | Stalling situations |
| Thunder Dash | Faster dash variant | Movement preference |
| Golden Ball | Kills don’t respawn ball | Extended pressure scenarios |
F Tier – Just Don’t
| Ability | Problem |
|---|---|
| Phase Bypass | Return teleport creates bad positions |
| Martyrdom | Only works after you die |
| Quad Jump | Doesn’t affect ball parrying |
| Basic Dash | Negligible combat impact |
| Platform | Creates pillar, minimal benefit |
| Displace | Random ball swap, often backfires |
| Luck/Misfortune | Targeting probability rarely matters |
| Super Jump | Vertical movement doesn’t help parrying |
These options either don’t interact meaningfully with the core parry mechanic or actively create disadvantages. Invest tokens elsewhere.
Best Picks for 1v1 Battles
Solo matches demand self-sufficient abilities since no teammates cover weaknesses. Your selection needs to handle everything alone.
Top Five 1v1 Selections
| Rank | Ability | 1v1 Strength |
|---|---|---|
| 1 | Infinity | Reliable in every situation |
| 2 | Phantom | Repositioning dominates duels |
| 3 | Singularity | Aggressive pressure wins |
| 4 | Slashes of Fury | Unpredictability in extended sets |
| 5 | Guardian Angel | Second chances matter in elimination |
Countering Popular 1v1 Picks
Against Infinity users, apply continuous pressure. They have limited activations before cooldown, so force them to burn the ability on easy situations then strike during the gap.
Against Phantom users, move unpredictably. If they can’t anticipate your position, the teleport becomes less valuable. Against Singularity users, stay calm during fast balls since the speed increase is dramatic but still parryable. Panic loses games more than ball speed.
Best Picks for Clash Mode
Team modes reward different priorities. Area effects, ally support, and multi-target pressure become valuable.
📖 Read More: Royale High Porcelain Doll Set Value & Trading Guide 2026
| Ability | Team Value |
|---|---|
| Quantum Arena | Mass disable enables team kills |
| Necromancer | Multiple defensive bodies help team |
| Zeus’ Storm | Team-wide slow creates opportunities |
| Time Hole | Zone buffs benefit nearby allies |
| Fracture | Split ball pressures multiple enemies |
Team Synergy Considerations
Avoid redundant abilities on the same team. If one player runs Quantum Arena, teammates should bring damage or defensive options to capitalize during the disable window. Communication matters since calling out activations lets teammates prepare for coordinated plays.
Cooldowns, Stats, and Upgrade Strategy
Managing Your Ability Timing
Every ability has a cooldown period after use. Don’t waste activations on easy parries – save Infinity for genuinely dangerous high-speed balls and use Singularity when it creates real pressure.
Track opponent cooldowns mentally. Just saw them use Guardian Angel on a close call? The next few seconds are vulnerable. Punish accordingly.
Upgrade Priority Guidelines
Upgrades improve effectiveness through shorter cooldowns, stronger effects, or longer durations. Focus on one ability first since a maxed Infinity dramatically outperforms three basic options. Depth beats breadth for competitive play.
Only diversify after your main selection reaches high upgrade levels. Second and third options matter less than primary mastery.
How to Unlock Abilities Efficiently
Token Farming Methods
Tokens come from match completion, victories, daily challenges, and active game codes. Win rates matter directly since victories reward substantially more tokens than losses. Check for active codes regularly for burst gains that supplement grinding.
Smart Investment for New Players
Start with one S tier option – Infinity works best for beginners due to its forgiving nature and universal applicability. Upgrade that single ability before buying others since the temptation to collect everything wastes resources.
For players wanting faster progression, itemku offers Blade Ball tokens and abilities directly. Skip the grind and jump straight into competitive play with the loadout you want.
Frequently Asked Questions
What should beginners unlock first?
Infinity. The forgiving timing window helps new players survive while learning core parry mechanics. It works in every situation without requiring advanced techniques.
How many abilities exist currently?
63 abilities as of the latest update. Developers add new options periodically, so this number grows over time.
Should I upgrade existing abilities or buy new ones?
Upgrade first. A fully upgraded S tier option outperforms multiple basic abilities. Only diversify after maxing your primary pick.
How do I counter Infinity users?
Apply continuous pressure. Force multiple activations in quick succession since the cooldown window after each use creates vulnerability. Strike hard during those gaps.
Which wins – Forcefield or Phase Bypass?
Forcefield wins decisively. Phase Bypass sounds appealing but the return teleport creates constant positioning problems. Forcefield provides reliable, predictable protection.
Can I equip multiple abilities at once?
No. You select one ability at a time, making your choice crucial for each game mode and matchup.
Final Thoughts on Ranking These Skills
The 63 abilities in Blade Ball offer genuine variety, but not all options deserve your tokens. S tier picks like Infinity, Singularity, and Slashes of Fury define competitive play for good reasons – they provide consistent advantages across skill levels and game modes.
A tier abilities remain excellent choices for players mastering their specific strengths. B and C tier options work in specialized situations. Avoid F tier entirely since those tokens serve you better elsewhere.
Whatever you choose, remember that mechanical skill matters most. The best ability loses to perfect parry timing and smart positioning. Use abilities to enhance strong fundamentals, not replace them.
Ready to dominate with your ideal loadout? Check itemku for fast ability acquisition and skip straight to the competitive experience you want.
